Printing under MACOS First, the drivers for the multifunction devices (MFD) must be downloaded and installed.
Driver
After downloading, run the installation (you may need to enter your local password for the MAC!).
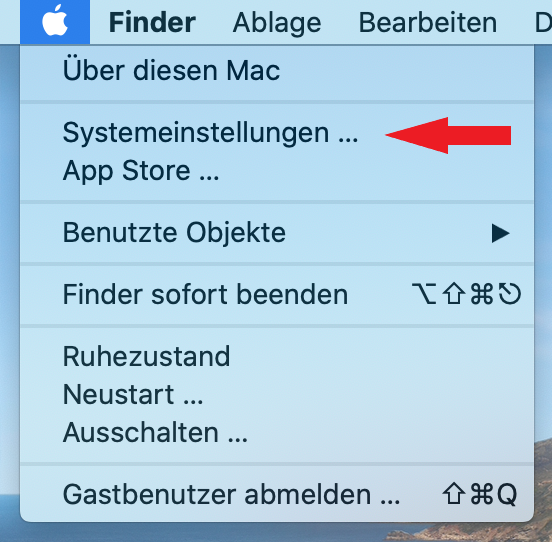
Step 1: After you have installed the driver package, open the “System settings”.
© IVV1-Geisteswissenschaften
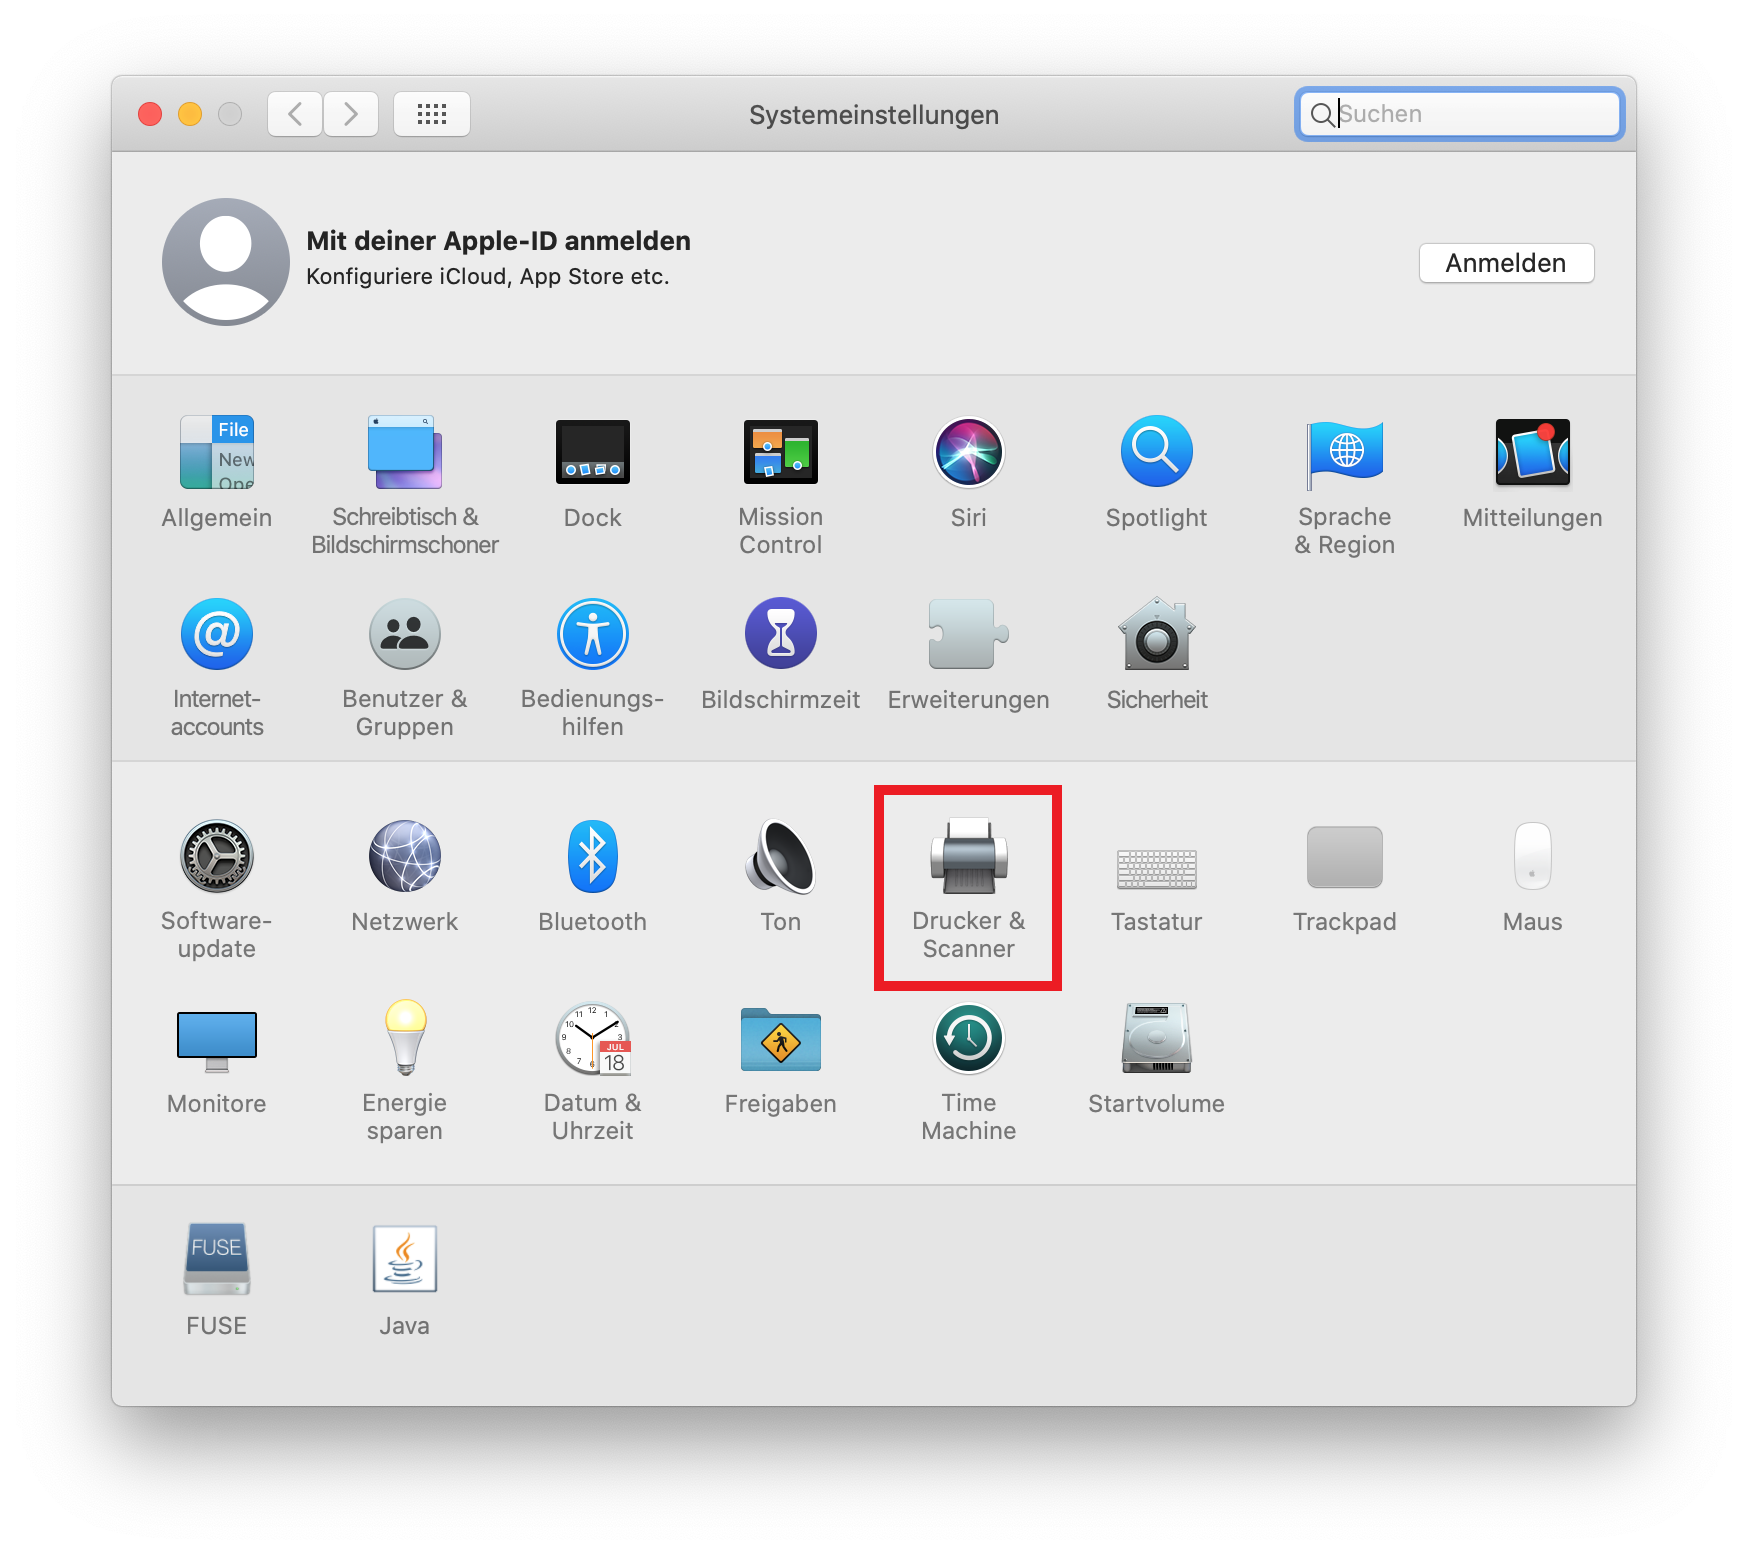
Step 2: Click on “Printers & scanners”.
© IVV1-Geisteswissenschaften
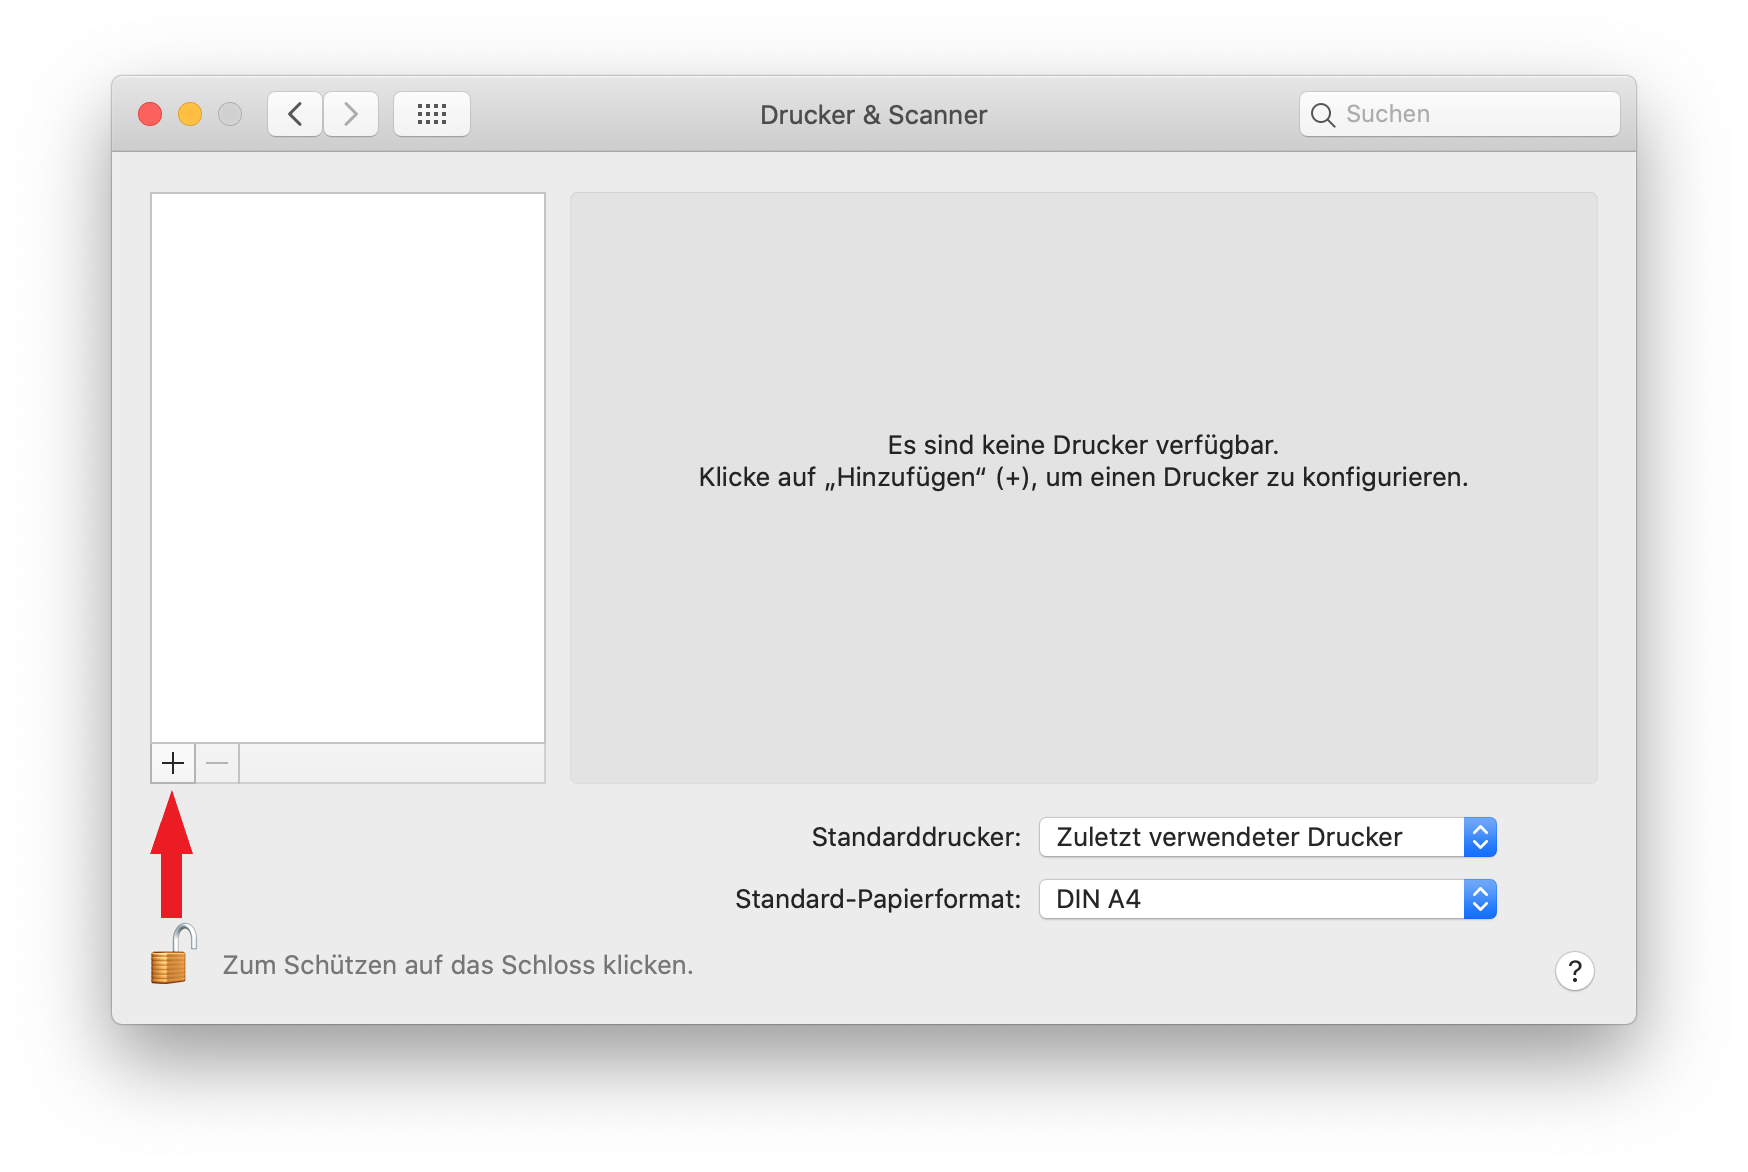
Step 3: Now click on the “Plus” at the bottom left to add a new device.
© IVV1-Geisteswissenschaften
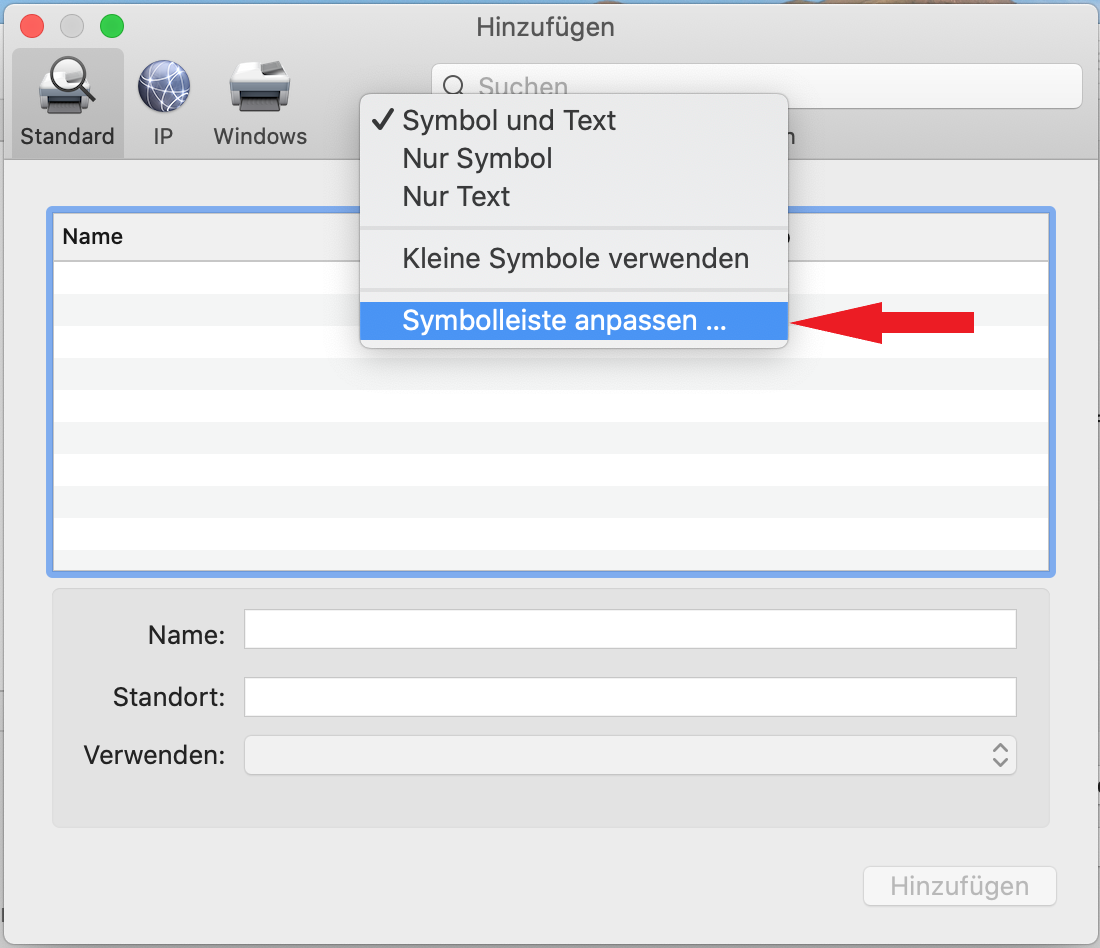
Step 4: Now right-click in the free area of the top bar and select “Customize toolbar ...”.
© IVV1-Geisteswissenschaften
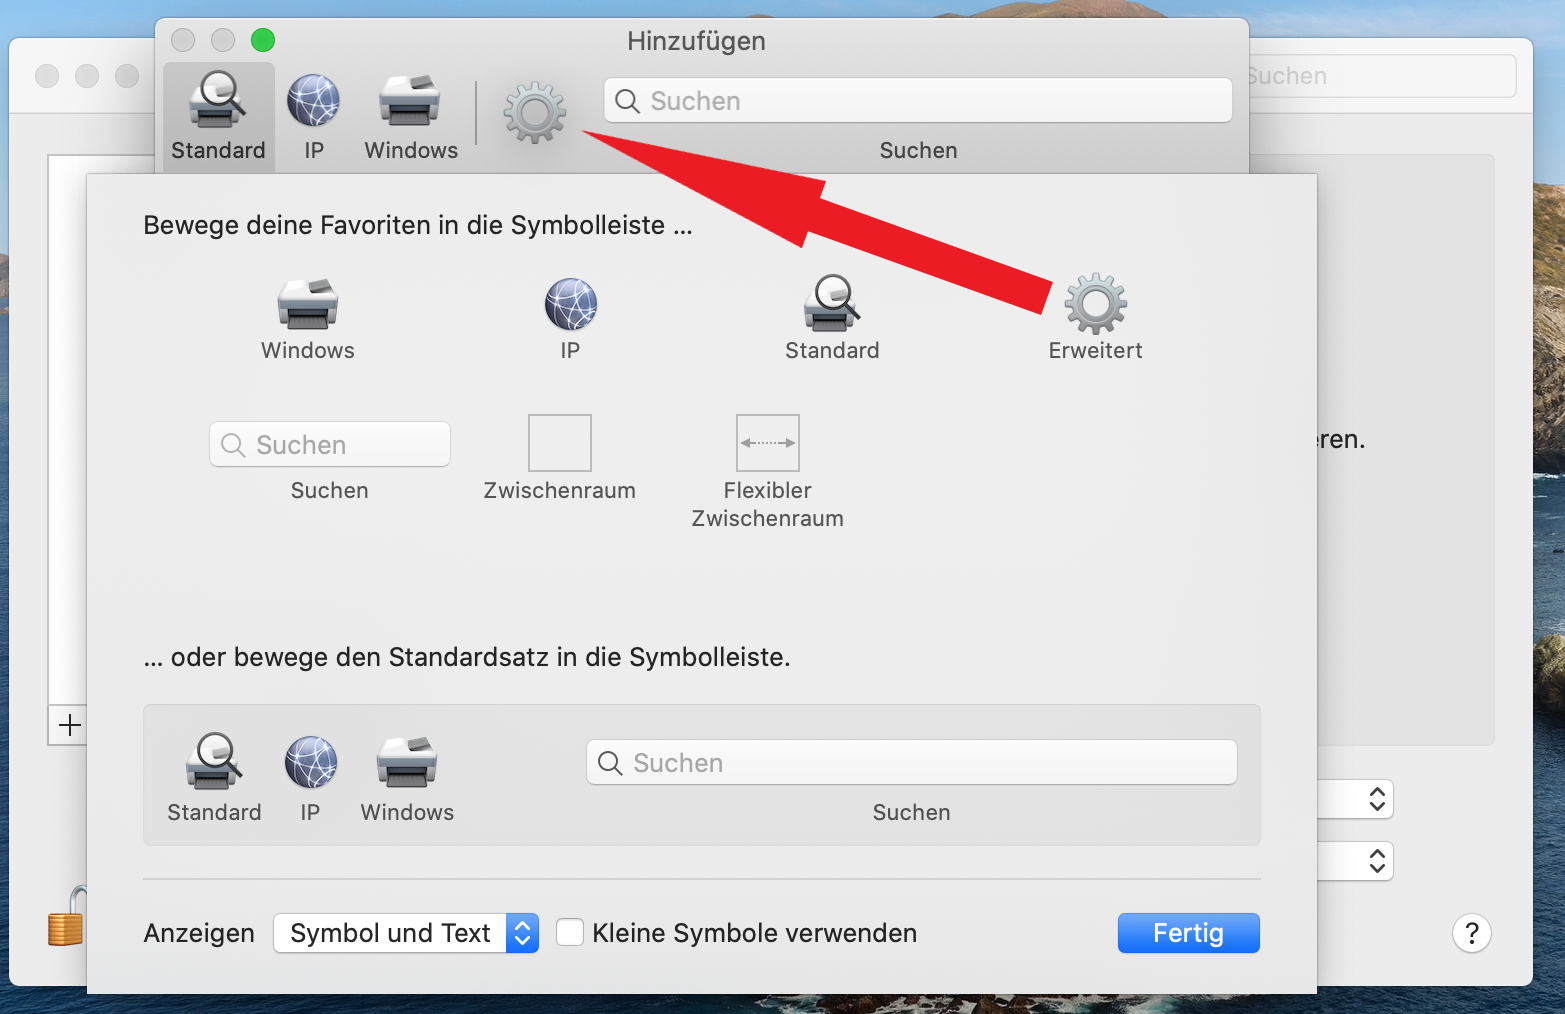
Step 5: Now drag the “Advanced” icon to the top of the toolbar and click “Done”.
© IVV1-Geisteswissenschaften
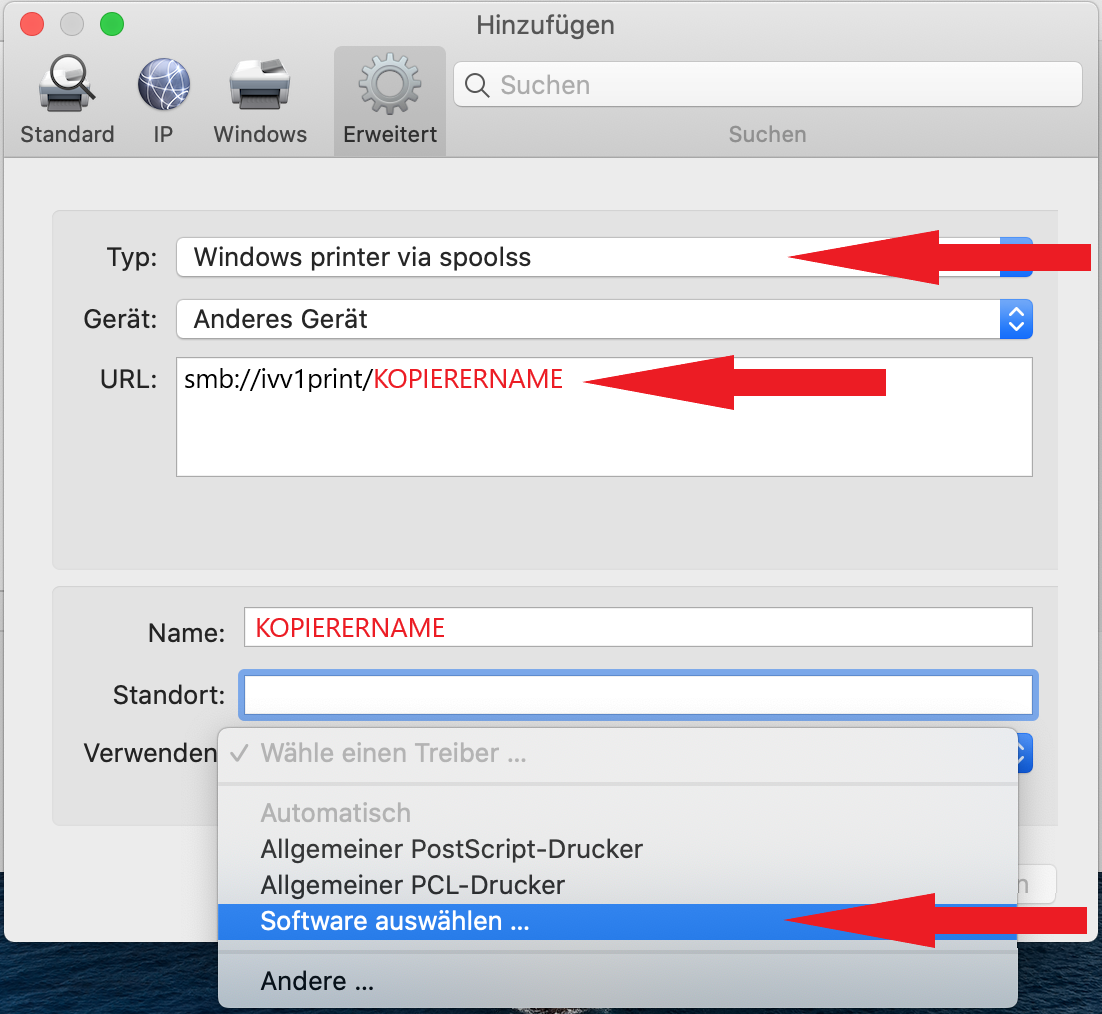
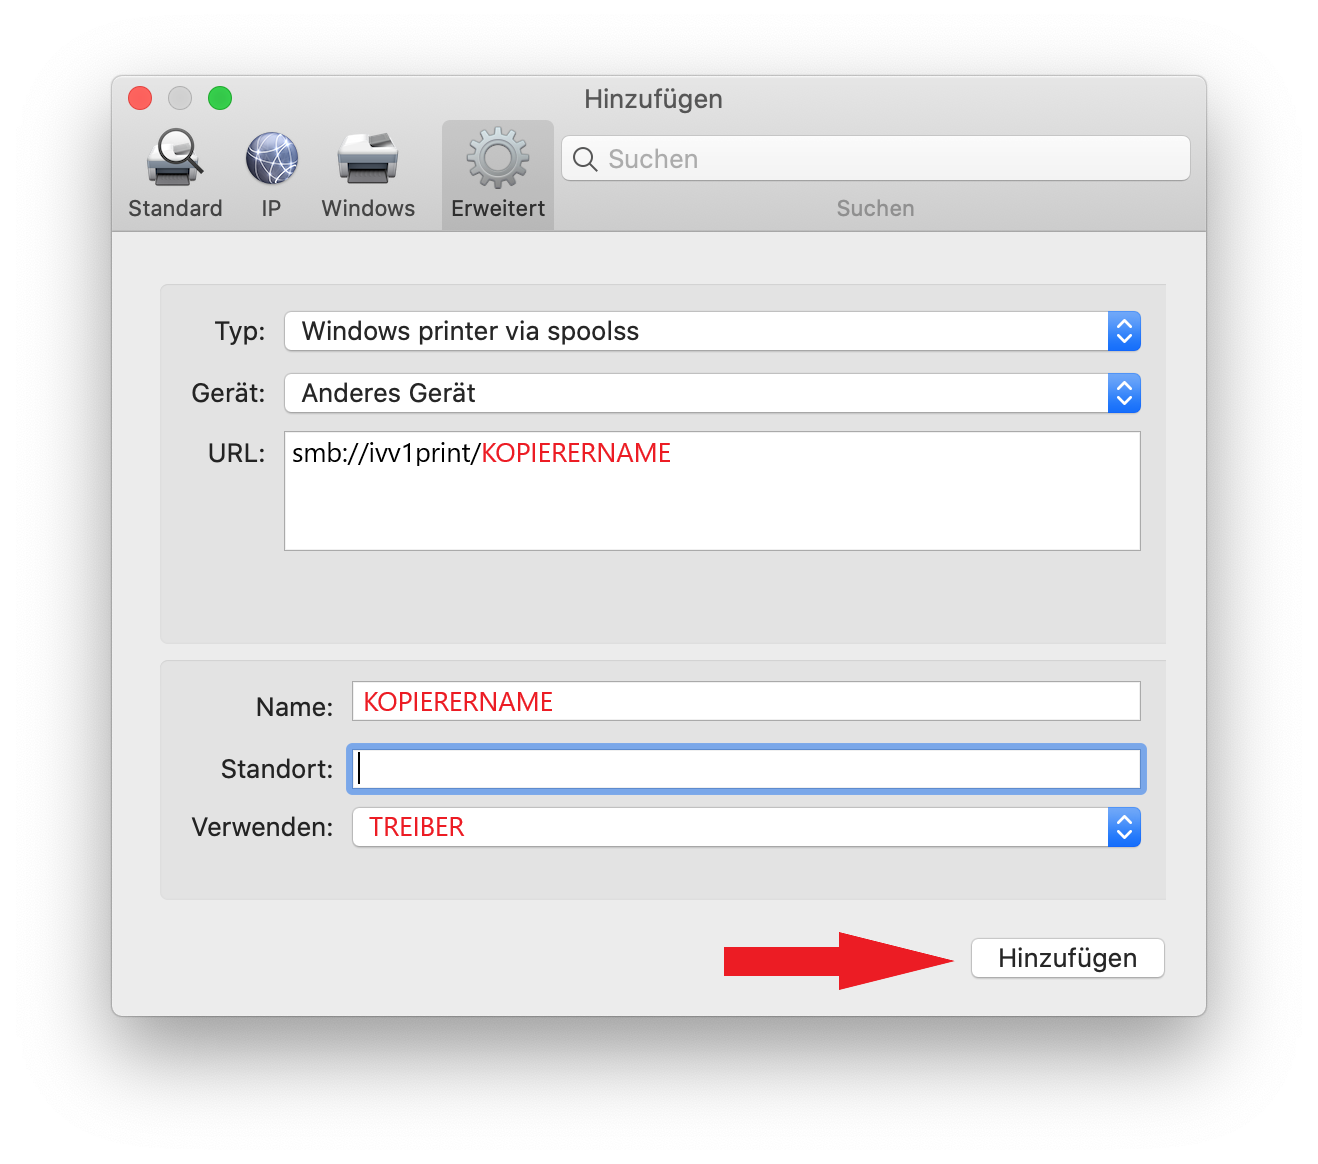
Step 6: Now select the newly added “Advanced” tab. Make the following settings there:
Type: “Windows printer via spoolss”
Device: “Other device”
URL: “smb://ivv1print1/KOPIERERNAME”
Name: freely selectable
Location: (optional and freely selectable)
Use: Select “Select software ...” here.
© IVV1-Geisteswissenschaften
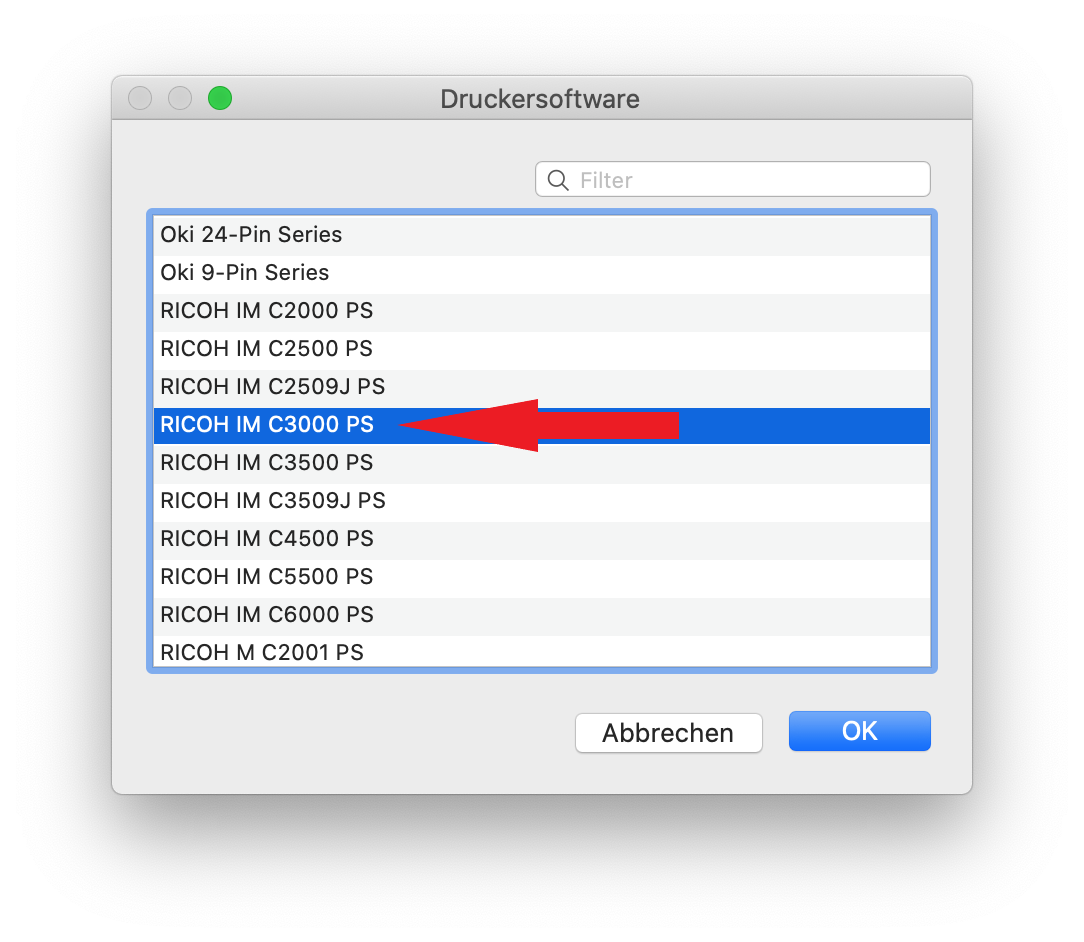
Step 7: You must now select the correct driver. Due to the previous installation, suitable drivers should be displayed. Select the correct entry here and confirm with “OK”.
© IVV1-Geisteswissenschaften
Step 8: The overview window should now look like this. Now click on “Add”.
© IVV1-Geisteswissenschaften
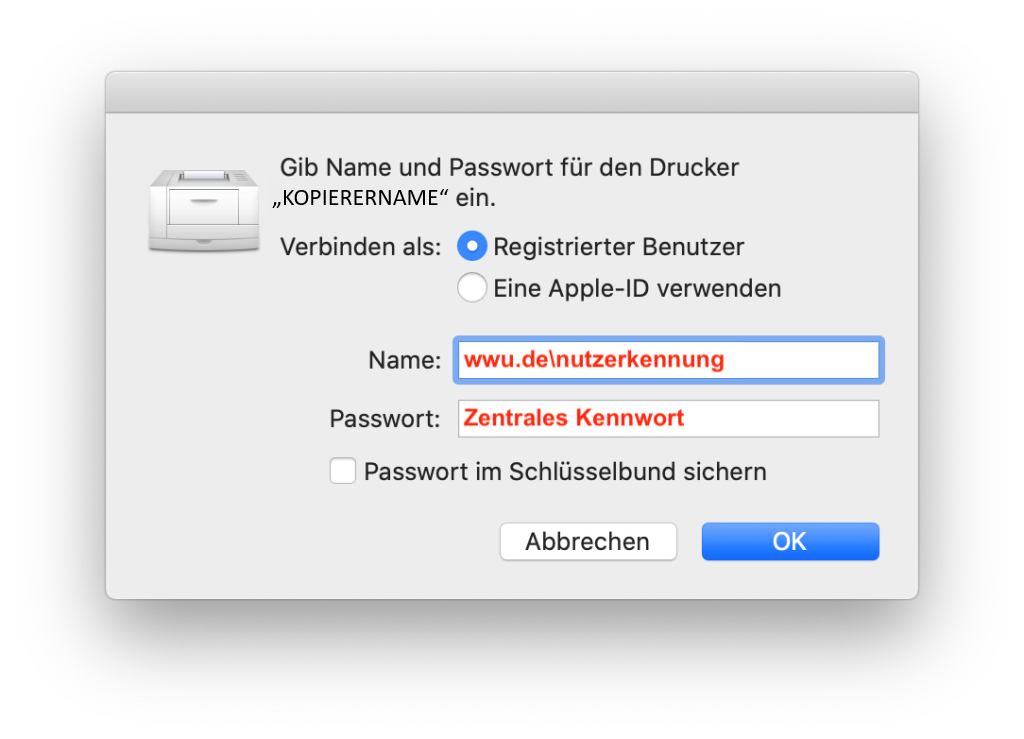
Step 9: It is best to make a test print now to store the login information. After sending the print job, you will be asked to enter your name and password. Enter your user ID and your central password.
© IVV1-Geisteswissenschaften
