MATLAB Installation Manual

You have the option to install MATLAB with various extensions in the form of toolboxes. Make sure that sufficient hard disk space (~19 GB) is available on your device.

Important: If you are outside the university network, you will need to have an established VPN connection to the university's network while using MATLAB.

  • MATLAB Installation

    Important: Do you have your installation key handy and the licensing file downloaded?

    1. Starting the installation

    After starting the setup file, you will be asked to enter an email address. Ignore this request and click on the Advanced Options in the upper right corner instead and select "I have a File Installation Key".

    1. Starting the installation
    © Uni MS IT

    2. Confirmation of the terms of use

    Next, confirm the terms of use with "Yes" and click "Next".

    2. Confirmation of the terms of use
    © Uni MS IT

    3. Entering the installation key

    Now you will be prompted to enter your installation key. You can find it in the previously downloaded file "FileInstallationKey" which you can open with any available text processor (Editor, Wordpad, Word etc.). After you have copied and pasted the key confirm your entry with "Next".

    3. Entering the installation key
    © Uni MS IT

    4. Selection of the licensing file

    In the next step, you will be prompted to select the licensing file (license.dat) you downloaded earlier. To do this, click on "Browse" and go to the directory where the file is located. Then confirm your selection with "Next".
     

    4. Selection of the licensing file
    © Uni MS IT

    5. Selection of the installation folder

    The selection of the installation path follows. You can simply confirm this with "Next".

    5. Selection of the installation folder
    © Uni MS IT

    6. Selection of the toolboxes to be installed

    Now you can specify which different products should be installed. Besides MATLAB itself you have the option to install different toolboxes and confirm your selection with "Next".
     

    6. Selection of the toolboxes to be installed
    © Uni MS IT

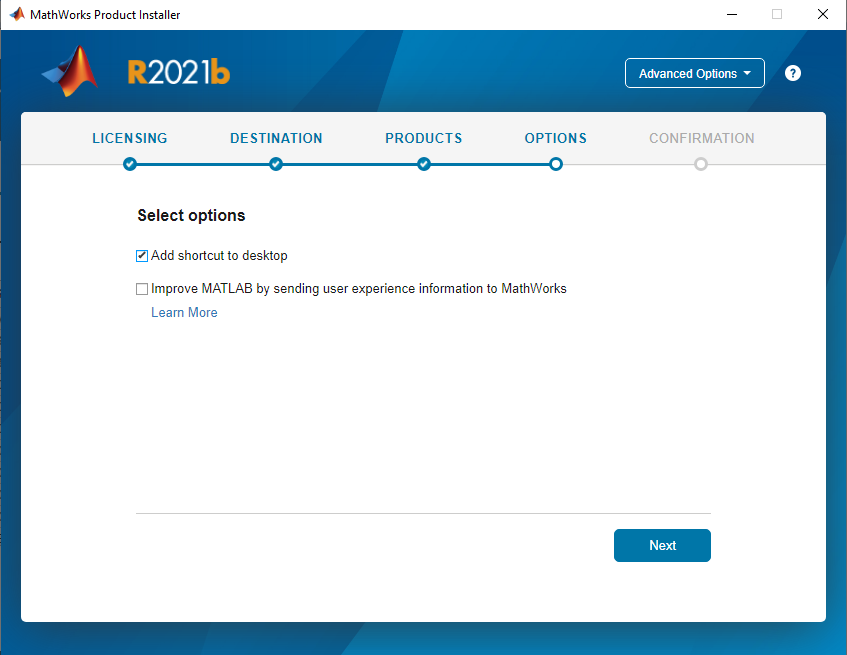
    7. Selection of the shortcut on the desktop

    You will then be asked if you want to create a shortcut on the desktop. Here, too, a confirmation via "Next" takes place.

    7. Selection of the shortcut on the desktop
    © Uni MS IT

    8. Start of the installation

    You will now see the installation path you specified and the set of selected products to be installed. With a click on "Begin Install" you start the installation of the program.

    8. Start of the installation
    © Uni MS IT

    9. Completion of the installation

    In the last step you will get the confirmation about a successful installation. You can close this with "Close". This completes the installation of MATLAB and you can now use the program.

    9. Completion of the installation
    © Uni MS IT